Focus Points and AF Modes Explained | Chris Bray Photography
chris bray
Tutorial by Chris Bray

Auto Focus Points and AF Modes


Focusing: selecting what's blurry and what's not. It sounds simple - and it is - but unless you understand some basics in selecting different focusing modes and focus points, failing to master this simple step can ruin a lot of good photos. It's just a quick tutorial this time - and many of you will know it all already - but when I start with this at each of my 1 Day Photography Courses, there's always a handful of people whose gasps of dawning comprehension remind me that the importance of this setup can't be overstated.

There are two factors at play here: Focus Points, which are the points in the camera's view which it can choose to focus on, and Focus Modes, which is how the camera focuses on these points. It is also important to note that all camera shutter buttons are two-stage: If you press the button gently, it depresses to a half-way, intermediate stop (which is when the camera is searching for something to focus on, and when it does, it usually beeps, flashes or displays a little green dot in the viewfinder to acknowledge this focus) but it's only when you press the button harder/further/'all-the-way-down' that it actually takes the photo.

Focus points:

selecting wrong AF points
Classic: AF chooses wrong point.
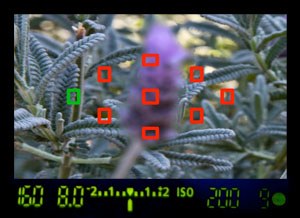
You may have noticed that cameras these days advertise as having more and more focus points '19-point autofocus system' etc, their patchwork of little points covering an increasingly larger portion of the cameras view. You can sometimes see these little points light up when you half-press the shutter button to focus. Devastatingly, by default, unless you've changed it (or if your camera mode is set to Auto) all of these focus points are 'active' and independently searching for something - anything - to focus on, and so when you half-press to focus, the first focus point to latch onto something 'wins'. It could be any of them, focusing anywhere in your frame - and very often it's the wrong point, or at least the wrong part of the right thing. As you'll learn later with controlling your aperture (if you don't know already), part of the joy of some photography is being able to have only a thin slice of stuff in-focus (ie a small depth of field), with everything in front and behind beautifully blurred out. In these situations particularly, focusing on exactly the right part of the person or animal (their closest eye) is critical - somewhere on the body isn't good enough.
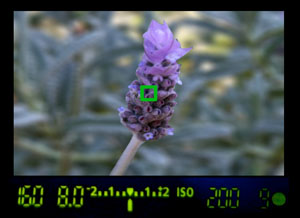
correct auto focus points
Just using centre AF point.
Don't be fooled into thinking that by having all of these focus points turned on that your camera is somehow focusing on 'all' of the points - it's not. A lens can physically only focus at one specific distance at a time. By having all the AF points active, it just means you're letting the camera decide which single point to select. So considering as your lens can only focus on one point in the end anyway, it's crucial that you chose exactly which point in your photo this is to be - ie your subject, not the blades of grass in front of it, or the mountains behind it.
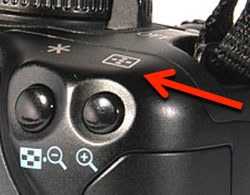
af points
AF point selection button.
Thankfully, in all camera modes more advanced than 'Auto', you can select which AF points you want the camera to use (ie all of them, just some of them, or only a particular one). You'll either have a dedicated AF Point selection button (most Canon's do), or perhaps it's inside your menu (most Nikons it's under AF -> AF Area Mode) and honestly, for 95% of you photography, you're far better off setting it to ONLY USE THE CENTRE AUTO FOCUS POINT (single-point AF, and set to be the middle point).

Yes, this means you have to point directly at the part of your photo you want to be in focus while you half-press, but as you'll see in the next section, providing you set your Focus Mode to 'Single Shot' / AF-S mode, after it's found that focus, providing you keep your finger half-pressed on the shutter button, you can then re-frame your camera to position your subject wherever you want within your scene (for better composition, such as abiding by 'The Rule of Thirds') before you then press the button all the way down to capture the photo. In this way you can very easily, quickly and accurately select exactly what part of your scene or subject you want in sharp focus, but still place it wherever you want in the shot.

Autofocus modes:

af points on camera
'One shot' / AF-S lets you aim,
then re-frame.
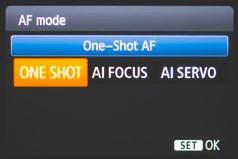
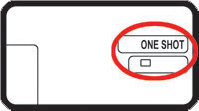
As mentioned though, for this 'half-press and hold while reframing' to work, you need to understand about AF Modes. Basically AF can operate in one of two ways, either in what Canon calls 'one-shot' mode (Nikon usually calls it AF-S 's' being for 'single') or 'AI Servo' (Nikon's AF-C 'c' being for 'continuous'). Some models have a third option, basically where you let the camera decide which of these two basic systems to use (AI Focus). The difference between these two major strategies is that in 'one shot' / 'AF-S' mode, once the camera's focus has latched onto something, provided you keep your finger holding the shutter button half way down, the focus won't shift after that, allowing you to re-frame the scene. In AI-servo mode (AF-C / continuous), the camera will continuously try to focus on that point the entire time you have the shutter button half pressed, which makes it impossible to re-frame the scene, because as soon as you try to move that centre-point off the subject, the focus will adjust to whatever that point is passing over at that time. This mode is only useful for tracking subjects that are moving quite quickly towards or away from you so they always stay in focus - try 'one shot' focus mode on an approaching animal for example, and by the time you've half-pressed to focus and then pressed it all the way down to shoot, the animal's already walked closer and is thus out of focus. If you are in such a situation (rarely), then switching to 'AI Servo' or AF-C will help, but otherwise, I think you're much better of to stay with 'one shot' / AF-S.

af points on 1d
I use 'one shot' AF mostly.
There are always going to be niche situations where it's better to use special settings, and I am generalising with the above. But I honestly leave my camera on 'one shot' single, centre point AF probably more than 95% of the time. Occasionally if I'm trying to track a bird in flight I'll a) set it to continuous focus tracking, and also perhaps even turn more (even all) of the AF points on, just because it can be too hard to track the little bird accurately enough to keep that middle AF point always over it's body without slipping focus of onto the background half the time. The latest cameras like the Canon EOS 5D mk III and the 1Dx (which has 61 AF points) have increasing gob-smacking AF tracking settings, infinitely adjustable for things like how much it'll let you slip off your target before it lets the focus slip off etc. Half-press on a bird in flight with these cameras and you can see a whole dancing mosaic of tiny AF points lighting up in turn as the bird passes across the field of view - it can even predict where the focus needs to be ahead of time so that by the time the camera actually gets around to taking the shot, the focus is already there. Amazing!

For now though, just practice getting that centre point right on what you want, half-press, wait for it to find focus, keep your finger half-pressed while you re-frame for better composition, and then press it all the way down to get the shot!

Did you find this tutorial helpful?


If so, please click the Facebook 'Like' button below to help others find it, then enjoy other free tutorials here.

Thanks!


My Customers