How to take Panning Photos | Chris Bray Photography
chris bray
Tutorial by Chris Bray
how to take panning photos

How to Take Great Panning Photos


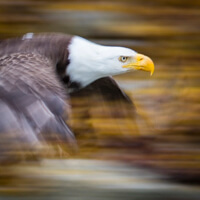
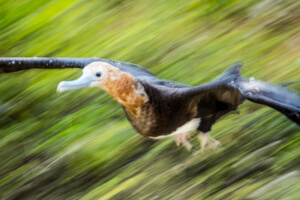
Using a deliberately slow shutter speed while tracking a moving subject can give beautiful results, capturing a real feeling of movement in an image. Ideally the animal/bird/subject appears sharp (because by tracking it, you've kept the subject in the same part of the photo for the duration of the photo), but the background behind has streaked-out from movement blur (because you've panned the camera during the photo). It's easy to learn and doesn't take much practice to start getting great results!

Camera Settings:

panning bird photo
The key requirement for a panning shot is a slow shutter speed to allow that streaky, blurry background movement. It's a balance - too fast and the subject won't have moved far enough to give you any streaky background; too slow and it'll be impossible to accurately track the subject the whole time, resulting in a blurry subject. It depends on how fast your subject's moving, and how long your lens is. You'll get a feel for it, but a good starting point for wildlife or cars with a telephoto lens could be about 1/30th sec. If you find everything comes out blurry then use a faster shutter speed. If you're not getting enough background streak then use a slower shutter speed.

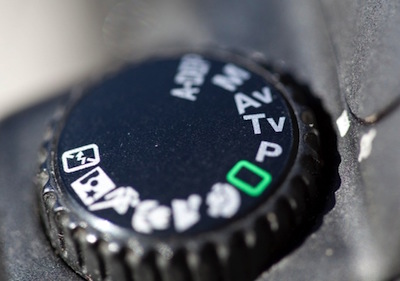
tv mode for panning
Switch to Shutter Speed Mode (Tv mode on a Canon, S mode for other cameras) and dial your shutter speed down to perhaps 1/30th sec. Set your ISO to 'Auto' so that it'll do whatever it has to do to give you that shutter speed irrespective of lighting conditions (it'll usually pick the lowest, ISO100). Set your focus-mode to 'AI Servo' ('AF-C' or 'tracking' for non-Canon's) so your camera will keep updating the focus to track your moving subject, and perhaps enable more than just one center AF point so you don't have to be so pedantic about making sure you don't accidentally slip the one centre AF focus point off the subject as you track it. Lastly, it can help to set your camera's 'drive mode' to continuous drive so you can just hold the shutter button down and rattle off a whole series of photos as your subject moves past, concentrating on trying to pan smoothly.

Good Panning Subjects:

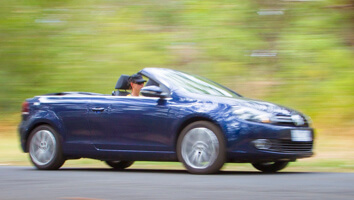
panning photo of car
Panning can work with any subject that's moving in any direction, but ideally you want something that's moving past you (square-on) to get maximum background streak/blur. Subjects moving towards or away from you are tricky as their size and perspective will change during the photo making it hard to keep them sharp. Something like a car driving along a road is a great, easy example to start with because their movement is smooth, predictable and easy to track - and the car stays the same shape as it moves.
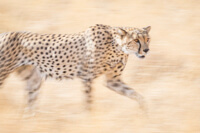
panning cheetah
When shooting a subject like a bird or animal, the problem is that the legs / wings move up and down as the subject moves forward, meaning you can't keep all parts of your subject in the same part of the photo during your pan. You're just going to have to accept that the legs / wings will blur with their movement. It's the head/face that you have to try and keep sharp in your photo - that's the part of your subject you must try and soothly track.

Good Panning Backgrounds:

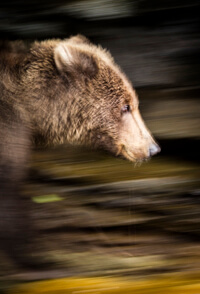
how to take panning bear
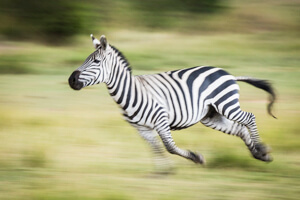
panning zebra
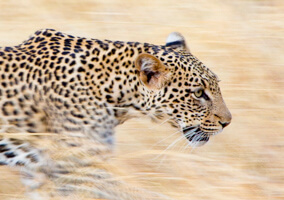
What the background looks like is actually really important for a good panning shot. If your subject is moving past a smooth, uniform background (like blue sky for example) it's not going to create any visual streaks or blur as you pan past it. For maximum effect, you actually want a background that has some texture, features and contrasts in it to reveal the pan, and ideally mostly a fairly contrasting colour to your subject so that your subject stands out.
panning leopard

Too Bright?

Because you're asking for such a slow photo, you may well find - especially during the middle of the day and when using a very slow shutter speed like 1/10th sec or longer - that the camera can't help but over-expose the photo. You'll likely just notice your photos are coming out too bright. If you're observant, though, you'd have also noticed (when looking through the viewfinder before you took the shot) that the f/# the camera was automatically trying to use (likely the largest possible) was flashing, or was replaced with 'hi' or 'low'. This is warning you that the camera can't give you what you want.
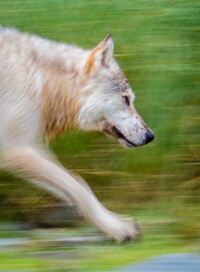
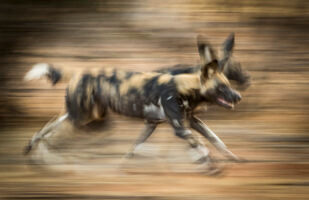
panning wolf
If this happens, you'll have to scroll your shutter speed a bit faster until it can cope. Don't try to solve the issue by dialling down your exposure compensation to make the photo darker – that won't help. Think about it: at the slow shutter speed you're asking for, the camera can't help but capture too much light, so your photo is going to be brighter than desired. It can't give you normal brightness, and it certainly can't give you a darker photo, even if you ask for it by dialling down your EC. Dialling up your EC (asking for a brighter photo) may stop the camera flashing/complaining (because that basically translates to, “Well, yes, if you want a bright photo, I can do that,” but it hasn't solved the problem – you're photo's still over exposed). The only way to fix it is to accept that you're going to have to use a faster shutter speed and get less streaky-movement in the background. On the up side, though, it'll be easier to keep the subject sharp because you don't have to track it for as long!
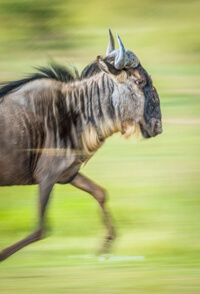
panning in low light

Pan When Light is Failing:

Often when photographing wildlife into the evening, as the sun goes down and that amazing golden lighting starts to fade, it can be really hard to get nice, fast, sharp photos of your subject anymore without cranking your ISO through the roof resulting in terribly grainy photos. Instead of just packing up and going home, why not embrace the slow shutter speed and swap over to trying to get some cool panning shots? Then you'll be able to get some creative movement photos, without the high ISO or frustration of your shot not being pin-sharp - a bit of blur doesn't matter so much in a panning shot. This may give you an extra half hour or so of great photo opportunities.
panning bird

Save into a Custom Mode:

As you've found, the camera settings for panning really are quite the opposite
custom user mode
to those you'd usually be shooting with. It can take a little while to get your camera all set up, and sometimes the subject will have gone by the time you're ready. For this reason, I like to save all these settings into a 'Custom Mode' or 'User Mode' (if your camera supports these) which lets me quickly snap to these ideal 'panning settings' instantly. Take a read of my 'Custom Modes' tutorial to learn about this.

Did you find this tutorial helpful?


If so, please click the 'G+' and Facebook 'Like' buttons below to help others find it, then enjoy other free tutorials here.

Thanks!


My Customers